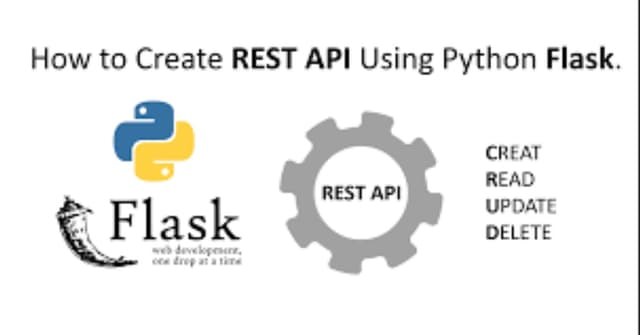
How to Create an API Using Flask simple gride.
rajneesh
7 min read
- python
Are you a machine learning engineer or frontend developer and you need to create your own custom API (Application Programming Interface) for your work and you need more customization in your API. Then you can use Python's Flask web framework. API creation in Flask is much easier than other programming language frameworks or libraries.
What is Flask?
Flask is a Microweb Framework which is written in Python It is a Microweb Framework because It doesn't need any tools or library to work Its syntax is very minimal And with its help, you can make web applications very easily It does not have any layer of Data Abstraction, Form validation or any other type of ORM Which makes it very minimal and easy to use It being minimal does not mean its possibilities are very limited By using extensions, you can also extend Flask And can perform a lot of tasks like adding data into database Doing form validation You can do all these things Many companies like Pinterest and Linkedin Use Flask to make their internal tools First of all Flask was seen to get released on 1 April 2010 Its developer, Armin Ronacher, who worked for Pocoo Group He made its development reach to such a level That today, still in 2020, Flask is a very popular framework Pocoo Python enthusiasts had a group which was framed in 2004 The antonishing fact is, from Ronacher's side The development of Flask was an April fool joke He just played an April fool prank Which turned into a serious idea And today, me and you, know Flask as a very popular web framework In April 2016, Pocoo group was dissolved And the development of Flask was shifted to Pallets Project And then what, Flask started getting very popular among the Python enthusiasts And the rest is history As of October 2020, Flask Is the most popular after Django On the second position of being the most popular web framework With the help of which, Python web applications can be made For a framework, it is a big achievement in its own Not just this, in 2018, Flask was given the title of the most popular web framework Which is another big achievement in its own, for Flask If I talk about it individually, Flask is a very special framework for me Bacause the first framework, during the starting of my career, which I learned was Flask And it made me a python lover, personally, I have made many websites with the help of it.
What is an API?
What is an API? Well, API stands for application programing interface, and really this is a set of rules that allow different software systems to communicate with each other. An API typically lives on some type of server and will manipulate some kind of database. It can handle different requests. So if I'm a user utilizing the API, I send a request to it. My request may contain some different data. Then the API is going to process this request and return to me a response. That response will typically contain data that I was requesting from the API. Typically, your API will manipulate some type of database and allow different access to the database values depending on the set of rules that you set up. you can create fully featured APIs in seconds by simply connecting to a data source.
Prerequisites
before we start creating api using flask you need to ensure this following points:
Basic Knowledge of Python: Understanding Python syntax and basic programming concepts.
Python Installed: Make sure Python is installed on your machine. You can download it from the official Python website.
Virtual Environment Setup: It’s good practice to use virtual environments to manage dependencies for your projects.
Flask Installation: Install Flask using pip.
Step-by-Step Guide
Step 1: Setting Up the Project
Create a Project Directory
first of all create your project directory for your project by opening any where you store your code. Open your terminal or command prompt and run:
mkdir flask_api
cd flask_api
Initialize a Virtual Environment
setting you your virtual environment where you can mange your project package or module in that virtual enviroment. by this you can save your system for pollution on unnecessary package or modules. use this code to make env:
python -m venv venv
source venv/bin/activate  # for windows `venv\Scripts\activate`
Install Flask
install flask in your virtual environment by using this cmd:
pip install FlaskStep 2: Creating the Flask Application
Create app.py
create a app.py file in your project directory. this file contain all the basic code for your flask application:
from flask import Flask #importing the flask app

app = Flask(__name__) #create an object flask to use app features

@app.route('/') #using this method use can create routes by passing the endpoint string to the route method
def home():
    return "Welcome to flask api"

if __name__ == "__main__":
    app.run(debug=True) #by passing debug True you can enable development help response
by this code you can create a simple flask app with single route on welcome massage.
Step 3: Defining API Endpoints
Create a Simple API Endpoint
let's create more enpoint with GET method:
from flask import Flask, jsonify

app = Flask(__name__)

@app.route('/')
def home():
    return "Welcome to flask api"

@app.route('/api/data', methods=['GET']) # we can pass on which methods this function wants to answer it by default is GET.
def get_data():
    data = {
        "message": "Hello, World!",
        "status": "success"
    }
    return jsonify(data) #we responding json data for this route

if __name__ == "__main__":
    app.run(debug=True)
Step 4: Running the Application
Run the Flask Application
To run your Flask app, you can use this following command in your terminal:
python app.pyTesting the API
Open your browser or use can use Postman tool to test the API endpoint its default run on "http://127.0.0.1:5000" . You can use "/api/data" to see a JSON response with the message "Hello, World!".
Step 5: Adding More Endpoints
Creating POST, PUT, and DELETE Endpoints
let add more endpoint with defferent methods like POST, PUT, and DELETE. let update over app.py file you can use this following code:
from flask import Flask, request, jsonify

app = Flask(__name__)

@app.route('/')
def home():
    return "Welcome to the Flask API!"

@app.route('/api/data', methods=['GET'])
def get_data():
    data = {
        "message": "Hello, World!",
        "status": "success"
    }
    return jsonify(data)

@app.route('/api/data', methods=['POST']) # in post method you can get body data using the request.json method
def post_data():
    data = request.json
    return jsonify(data), 201

@app.route('/api/data', methods=['PUT'])
def update_data():
    data = request.json
    return jsonify(data), 200

@app.route('/api/data', methods=['DELETE'])
def delete_data():
    return jsonify({"message": "Data deleted"}), 204

if __name__ == "__main__":
    app.run(debug=True)
Step 6: Structuring the Project for Larger Applications
Organizing Code into Blueprints
as your app grow it hard to manage your project. you can use this blueprint or layout by which you can easily handle large flask application by structuring using this blueprint. in this post i am going to provide a simple layout to manage flask app for very large application you can comment on this post below i can provide you.
Blueprint :
/flask_api
├── app.py
├── /api
│   ├── __init__.py
│   └── routes.py # you can store your all routes in this file
└── requirements.txtapp.py:
from flask import Flask
from api.routes import api_bp

app = Flask(__name__)
app.register_blueprint(api_bp, url_prefix='/api')

if __name__ == "__main__":
app.run(debug=True)/api/__init__.py:
from flask import Blueprint

api_bp = Blueprint('api', __name__)

from . import routes/api/routes.py:
from flask import request, jsonify
from . import api_bp

@api_bp.route('/data', methods=['GET'])
def get_data():
    data = {
        "message": "Hello, World!",
        "status": "success"
    }
    return jsonify(data)

@api_bp.route('/data', methods=['POST'])
def post_data():
    data = request.json
    return jsonify(data), 201

@api_bp.route('/data', methods=['PUT'])
def update_data():
    data = request.json
    return jsonify(data), 200

@api_bp.route('/data', methods=['DELETE'])
def delete_data():
    return jsonify({"message": "Data deleted"}), 204
Step 7: Handling Errors and Responses
Error Handling
Implement custom error handling to improve the user experience. Update app.py:
@app.errorhandler(404)
def not_found(error):
    return jsonify({"error": "Not found"}), 404

@app.errorhandler(500)
def internal_error(error):
    return jsonify({"error": "Internal server error"}), 500
Conclusion
in this post i have only covered basic topics of flask by which you can easily create api for your need if you want to create large application with flask then i am not recommend you to use flask for that you can use Django. flask is currently used to handle ai data using api. if you are using for create app then use blueprint and custom error handling to make you api easy to handles files. to make it secure, you can Implement authentication on the flask app with any datebase after then you can Deploy this Flask API on any server to access data from any where.

